Setup
How to Set up the Jury
1. Go to Jury > Administration. Select the call you want to view from the Current Event drop-down list.
2. Be sure the Setup button is selected.
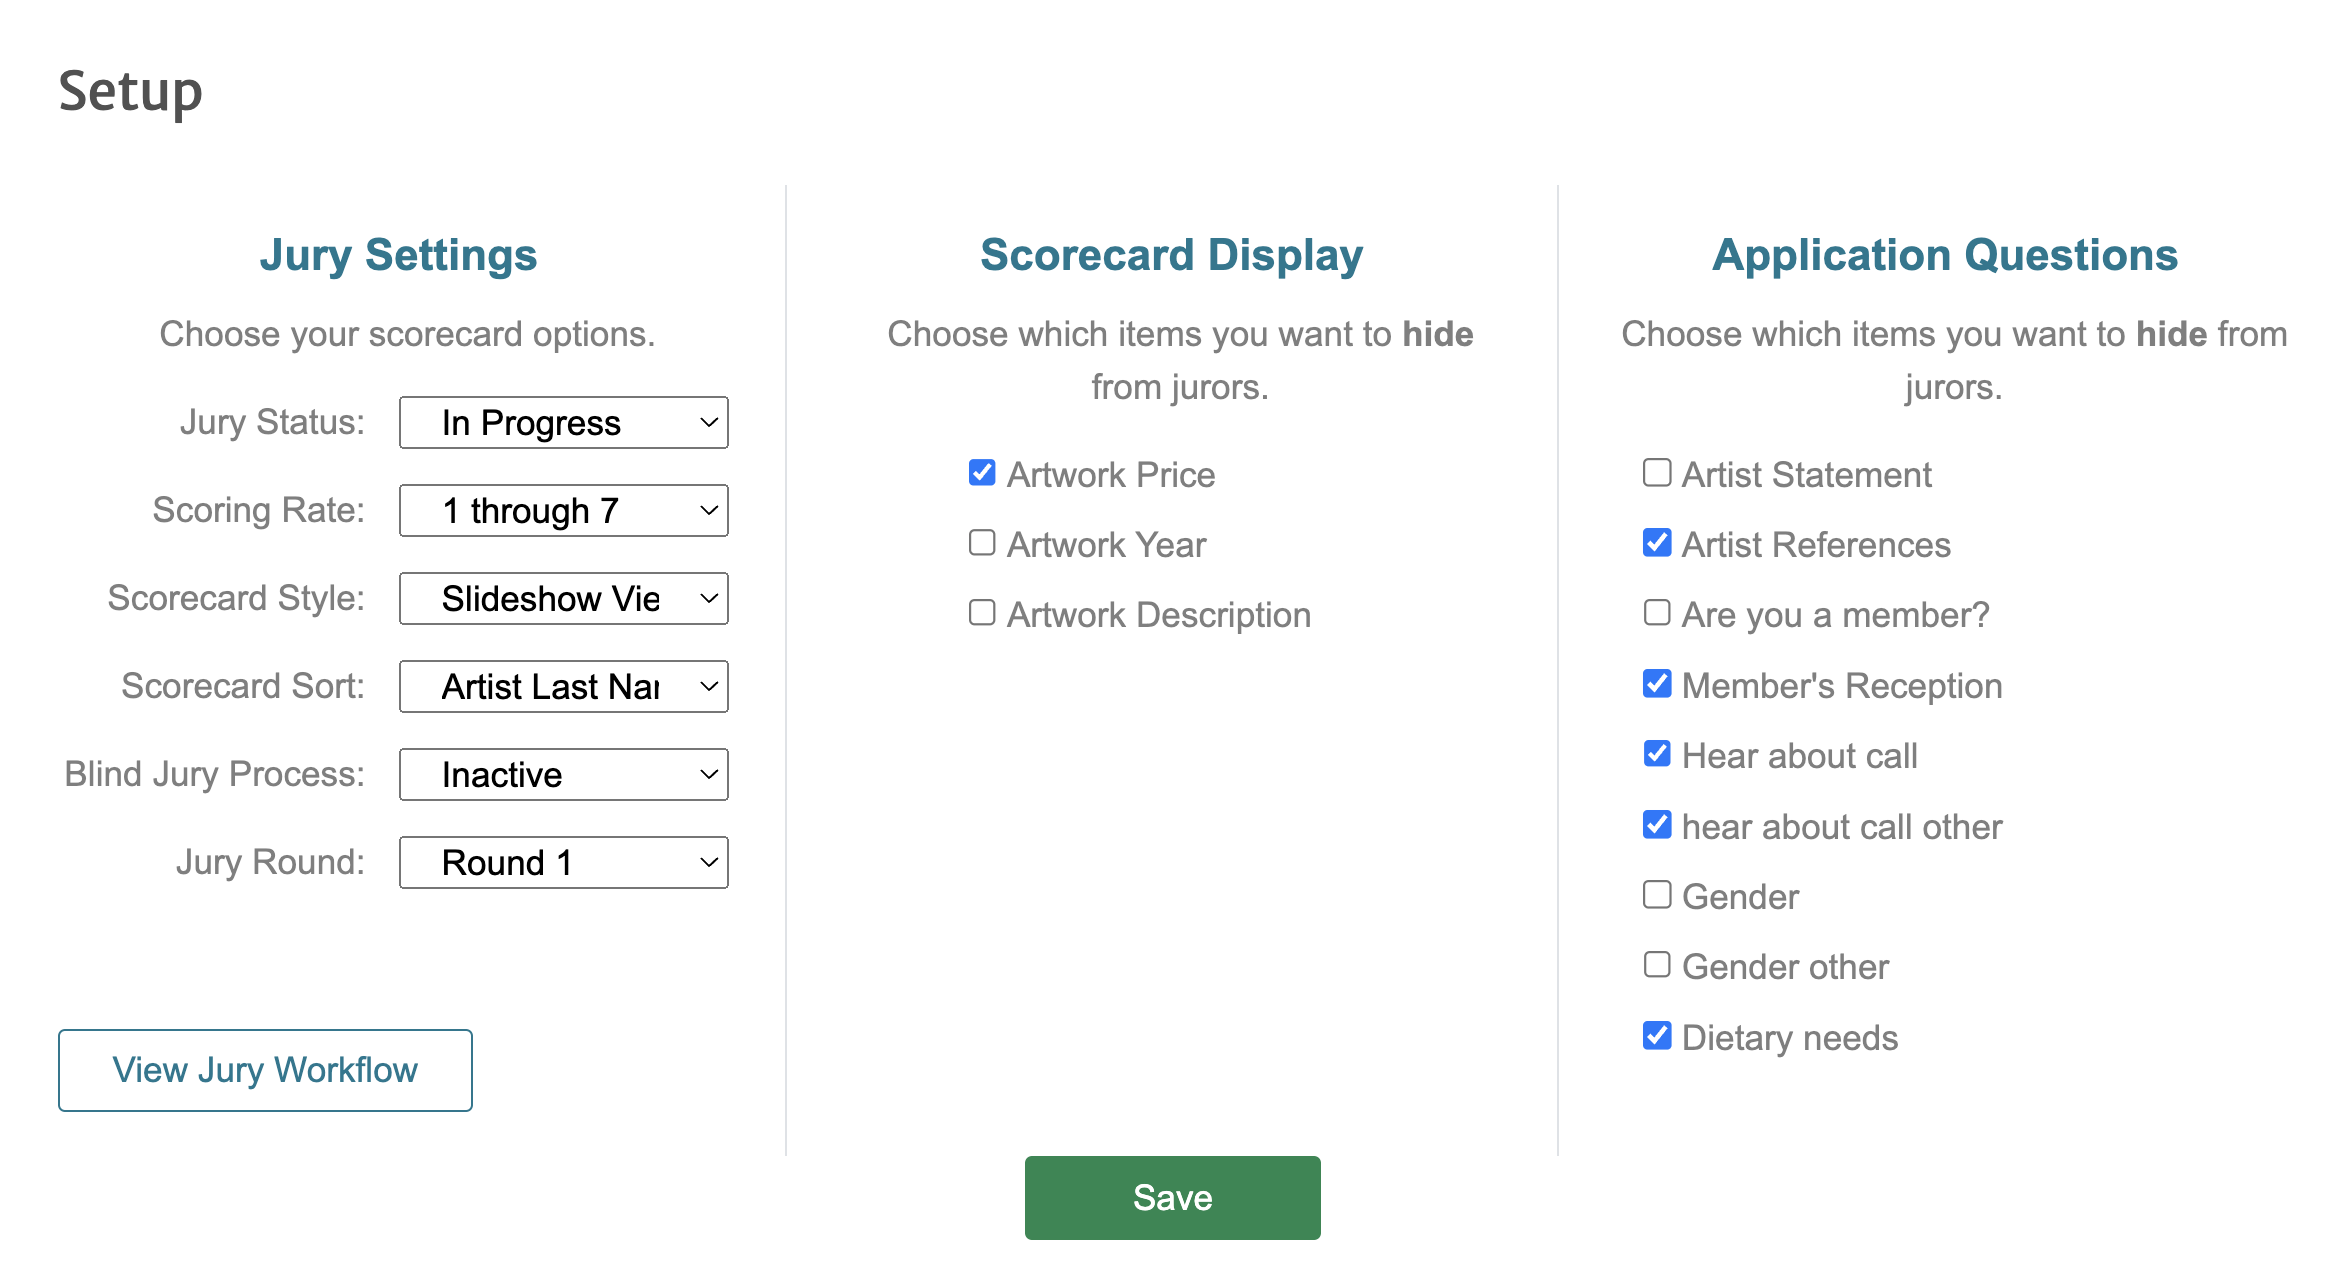
3. Under Jury Settings, choose your scorecard options. Click to expand the definitions below.
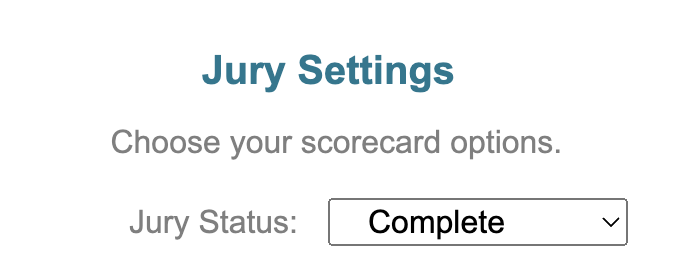
Jury Status
- Not Yet Started: The scorecard is closed to jurors and application statuses are visible to the artists.
- In Progress: The scorecard is open to jurors, and application statuses are hidden to the artists.
- Complete: The scorecard is closed to jurors, jury results are completed, and application statuses are visible to the artists.
Scoring Rate
- 1 through 7: 1 being the lowest, and 7 being the highest.
- 1 through 20: 1 being the lowest, and 20 being the highest.
- Yes, No, Maybe: Value of 3, 1, and 2, respectively.
Scorecard Style
- Slideshow View: Displays the scorecards as a slideshow one at a time against a gray background.
- List View: Displays the scorecards as a list of entries against a white background.
- Grid View: Displays a grid of 20 thumbnails with scoring options underneath. Available for Scoring by Art events only.
Scorecard Sort
- Application ID: Sorts the entries in ascending order by the application ID#.
- Artist Last Name: Sorts the entries in ascending order (A to Z) by last names.
- Artist ID Randomly: Sorts the entries in a random order. When selected, click Randomize Order to randomize the entries.
Blind Jury Process
- Active: Artist names are hidden from the scorecards.
- Disabled: Artist names are visible on the scorecards.
Jury Round
If you are conducting multiple jury rounds, select your next round number. Scores from Round 1 will be hidden during Round 2 where jurors can enter new scores. Repeat the process for as many rounds as needed.
4. Under Scorecard Display, choose which artwork details you want to hide from jurors.
5. Under Application Questions, choose which custom form questions you want to hide from jurors. All custom questions you created for your call, if any, will be listed.
6. Click the Save button to save changes to your jury setup.
How to Add a New Juror
- Go to Jury > Administration > Choose Event.
- Locate the Jurors section.
- Click Add Juror.
- Enter your juror’s information in each field. You will create the juror’s username and password.
- Click Save to save the new juror profile.
- Once added, the Select Calls to Jury section will appear.
- Check the box next to the name of the call you are assigning to your juror.
- Click Save and your juror will be assigned to the call.
How to Assign an Existing Juror to a New Call
- Go to Jury > Jurors.
- Find the existing juror profile on the list or click Show Inactive to view disabled juror profiles.
- Click View Juror next to desired the juror profile.
- Next to Select Calls to Jury, check the box next to the name of the call.
- Click Save to save changes.
- Your juror will be assigned to the call and will appear on the call’s Jury Administration page.
Hover over the blue icons to view the definitions of each field.
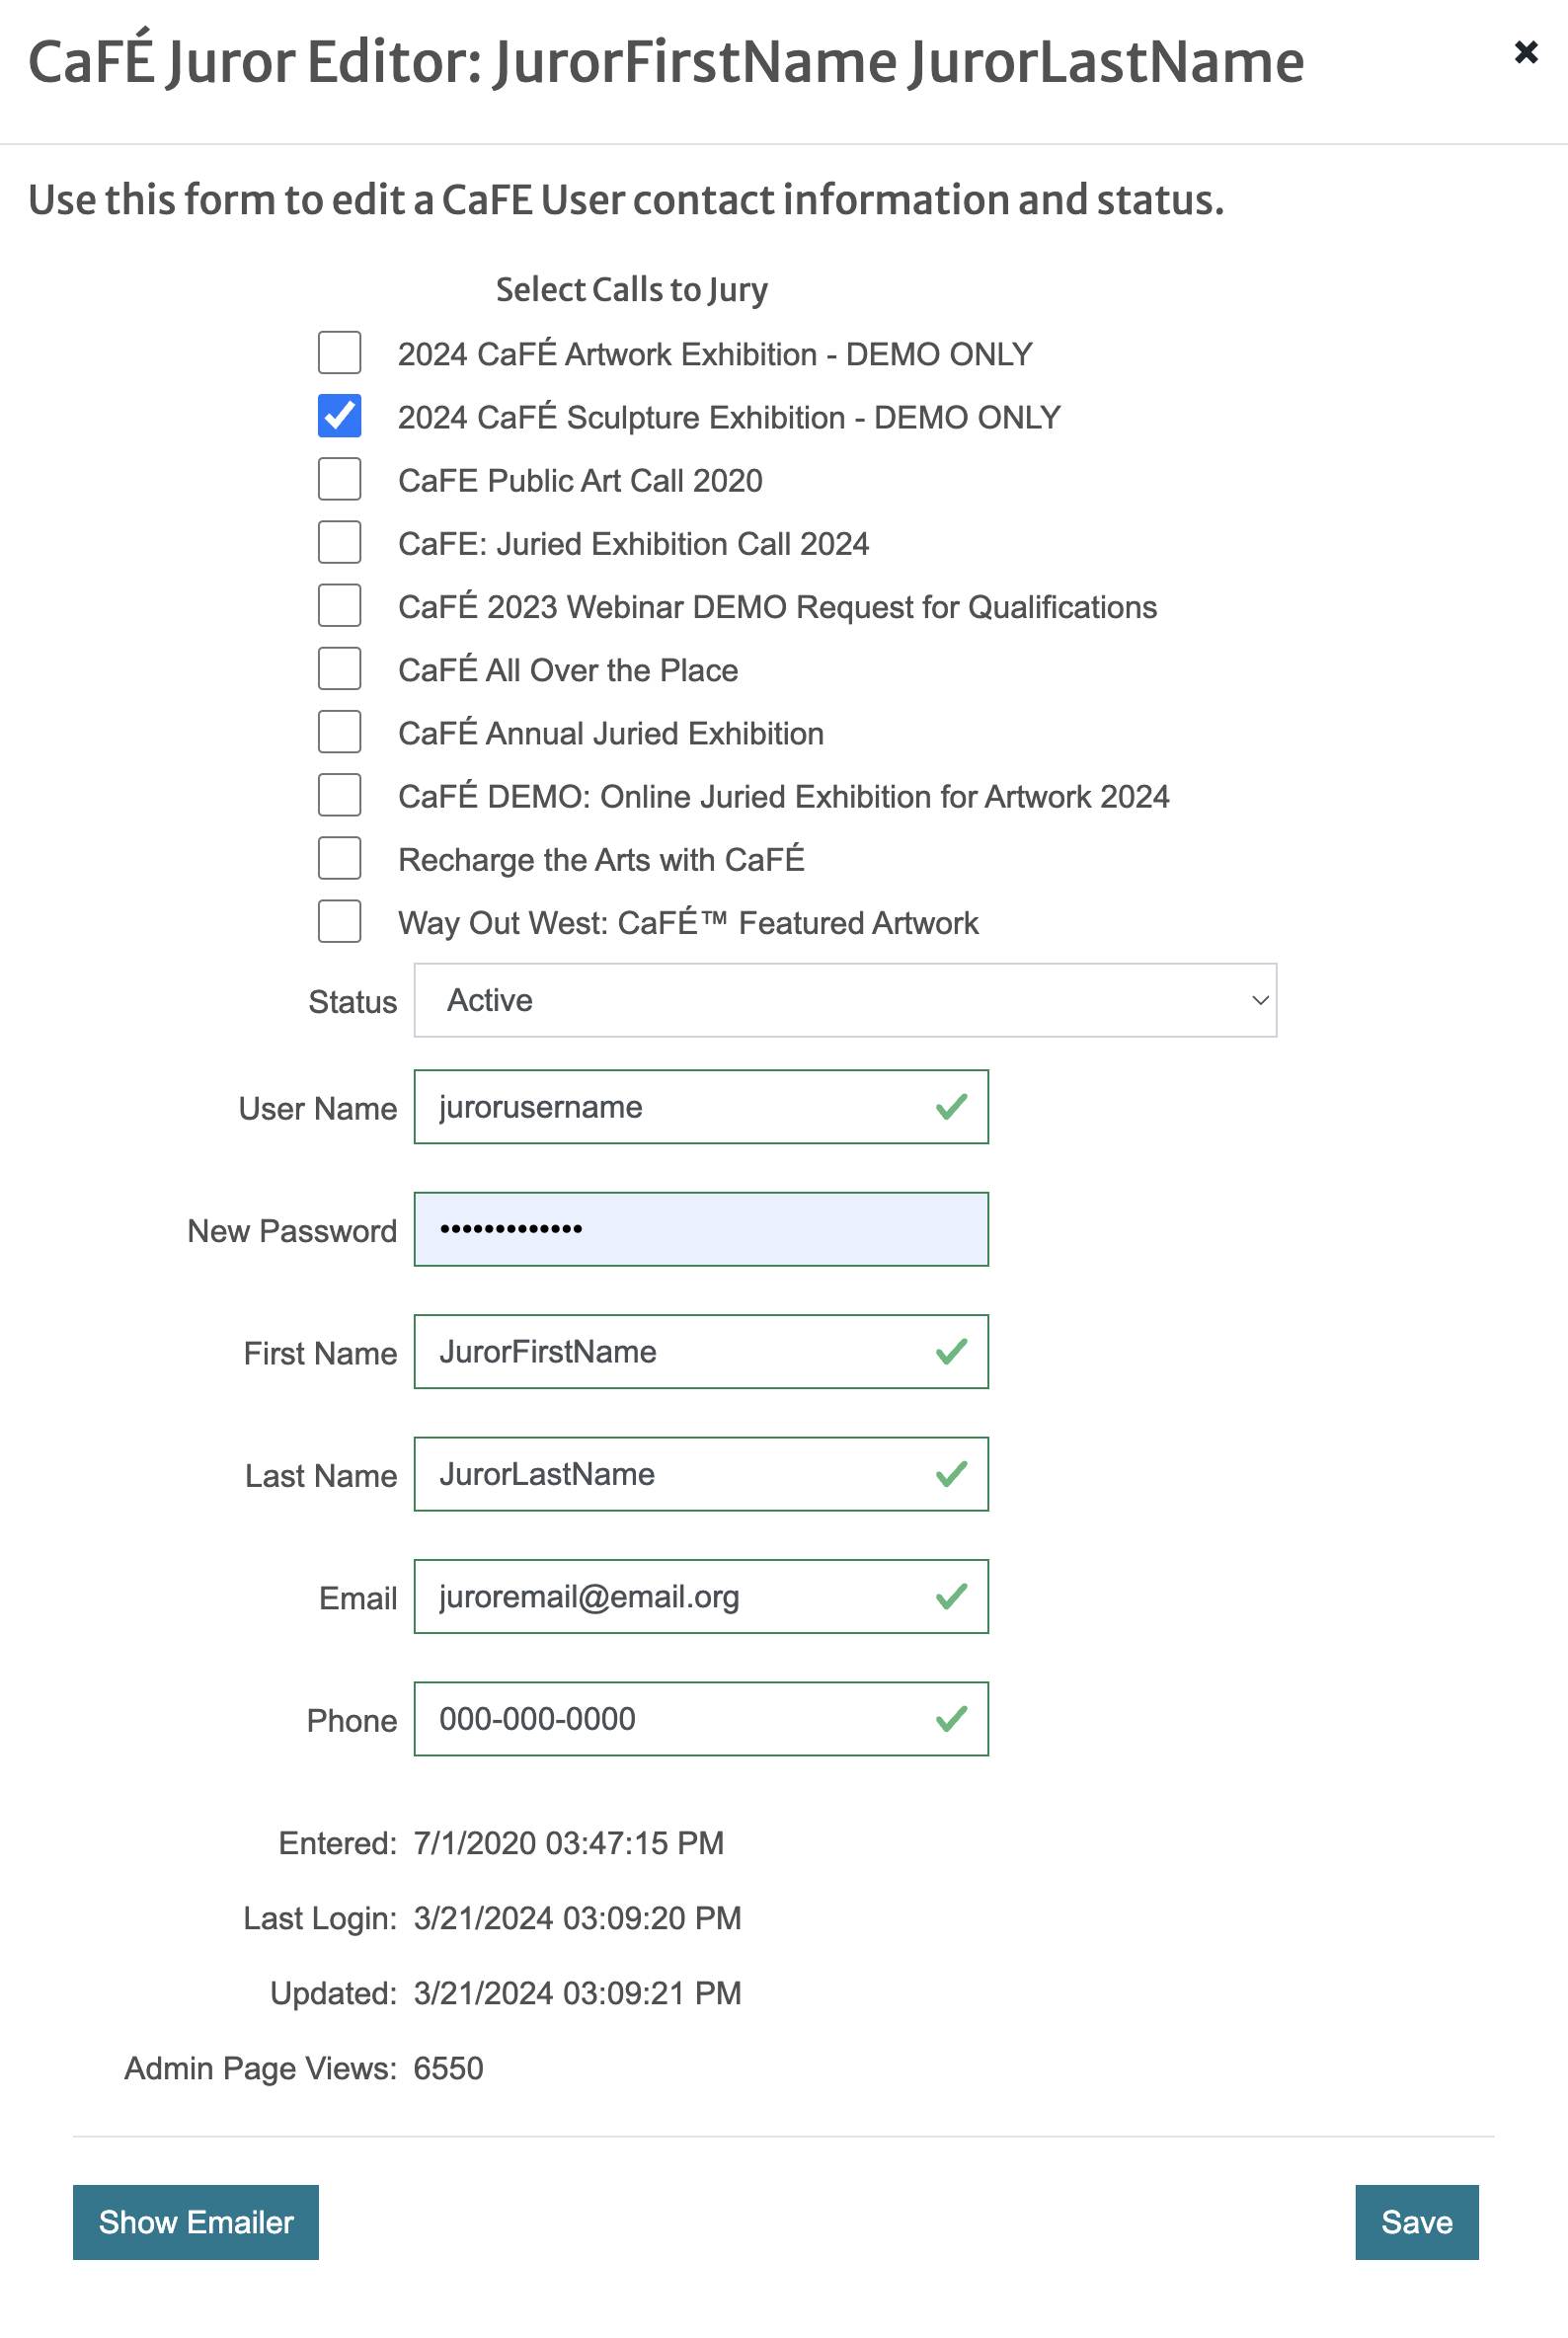
Select Active.
Create a username for your juror (e.g. jsmith).
Create a password for your juror (7 characters minimum, a lowercase and uppercase letter, and a number).
Enter your juror’s first and last name.
Enter your juror’s email and 10-digit phone number.
Click Add to save the new juror profile. If editing an existing profile, click Save.
Click to send a message to your juror with their login information. Do not send passwords.
How to Begin the Jury
- Ensure all the entries are in the Received status.
- Ensure the Jury Status is set to In Progress.
- Instruct your juror(s) to log in at admin.callforentry.org with the credentials provided by you.
- Direct your jurors to this help page for instructions on how to log in and score the entries: Help for Jurors.
- You will be able to see the number of scored entries by each juror on the Jurors section of the Jury Administration page.
NOTE: If the juror logs in to their account and sees the error message, Error: You have not yet been assigned to any active Jury events, this means your Jury Status is not set to In Progress OR your juror’s account is not assigned to the call under the Select Calls to Jury portion of their account.
Manage
How to Move Applications to the Not Invited Status
1. Go to Jury > Administration > Choose Event.
2. Click Manage, then click Change Status to Not Invited.
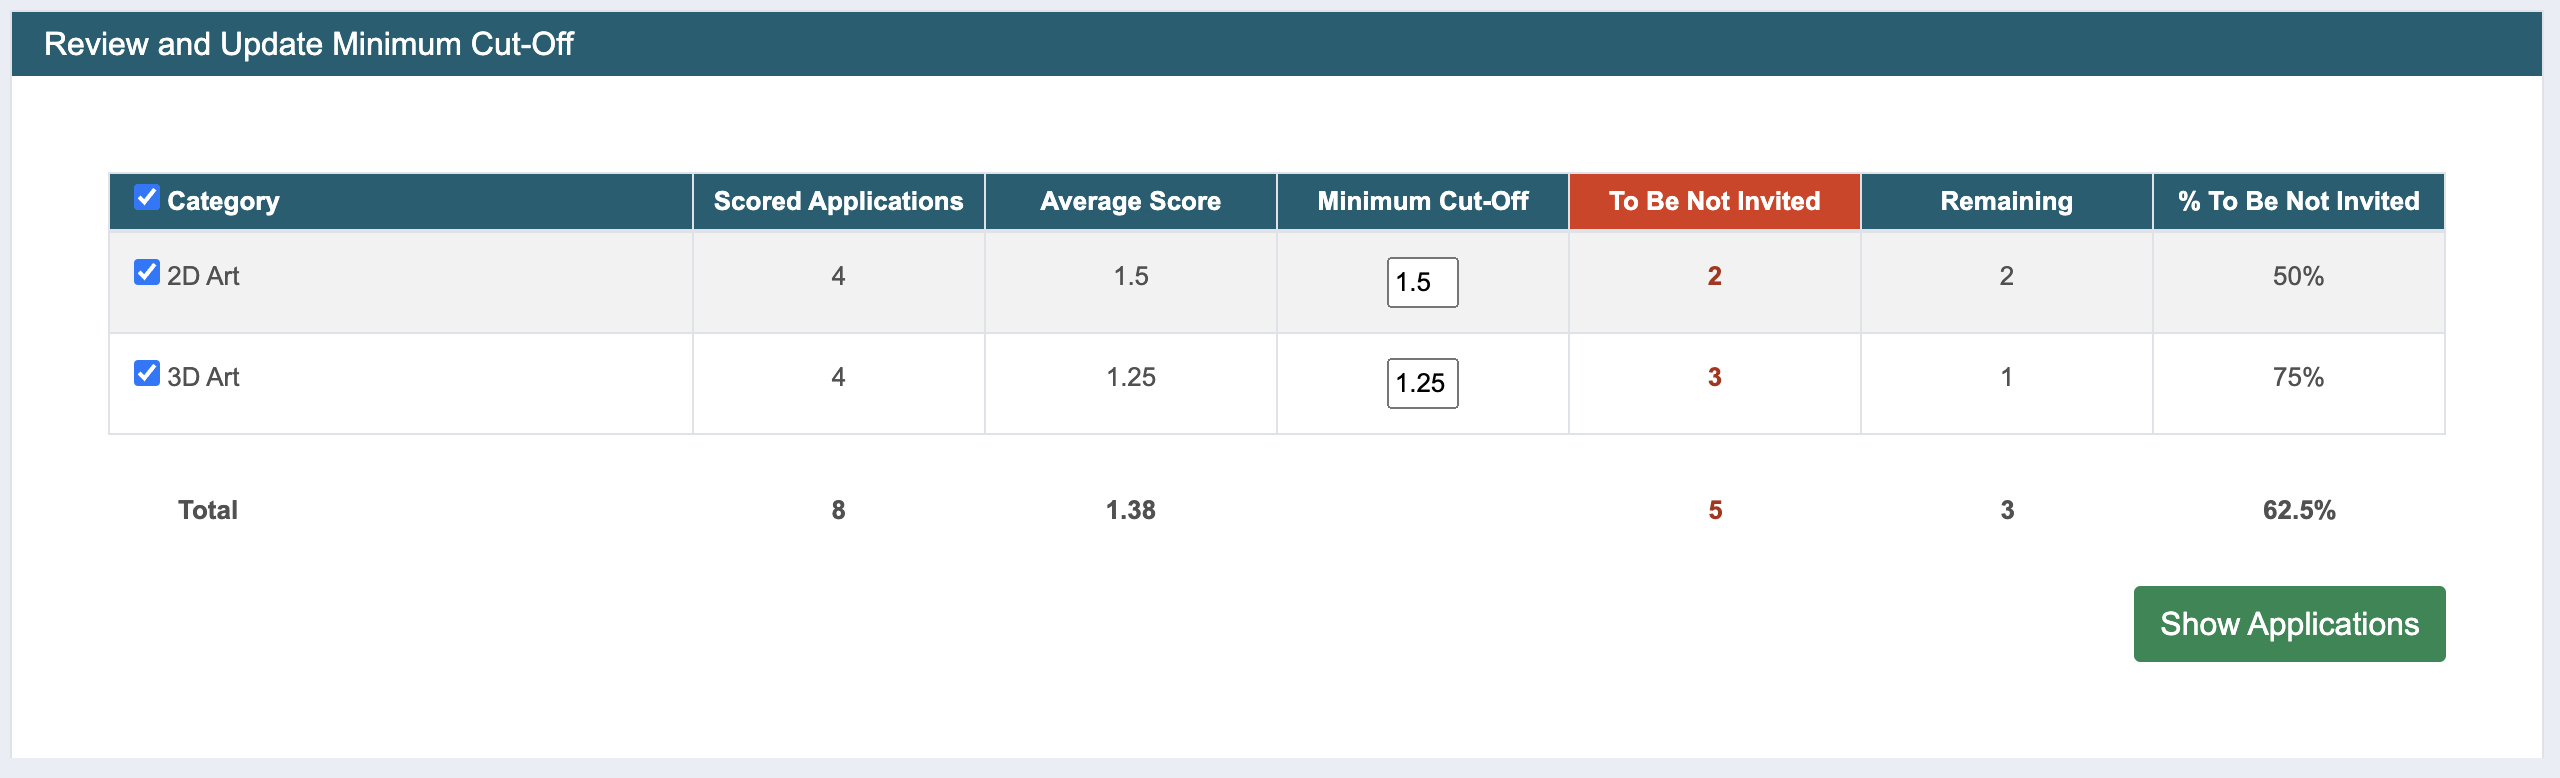
3. If applicable, select each Category from which you want to change the application statuses.
4. Enter the Minimum Cut-Off. Any entries with a score below this cut-off will be moved to the Not Invited status and eliminated from the jury. The default minimum cut-off is the average score of all entries.
For example, if you want to eliminate the entries that scored lower than 4, enter 4 as your minimum cut-off.
5. The number of entries in the To Be Not Invited, Remaining, and % To be Not Invited columns will update automatically when you change the minimum cut-off score.
6. Click Show Applications.
Hover over the blue icons to view the definitions of each field.
1
Select the Categories of the entries to be moved to Not Invited.
2
Leave the minimum cut-off as default or enter the desired cut-off score.
3
Click Show Applications to see the list of entries to be moved to the Not Invited status.
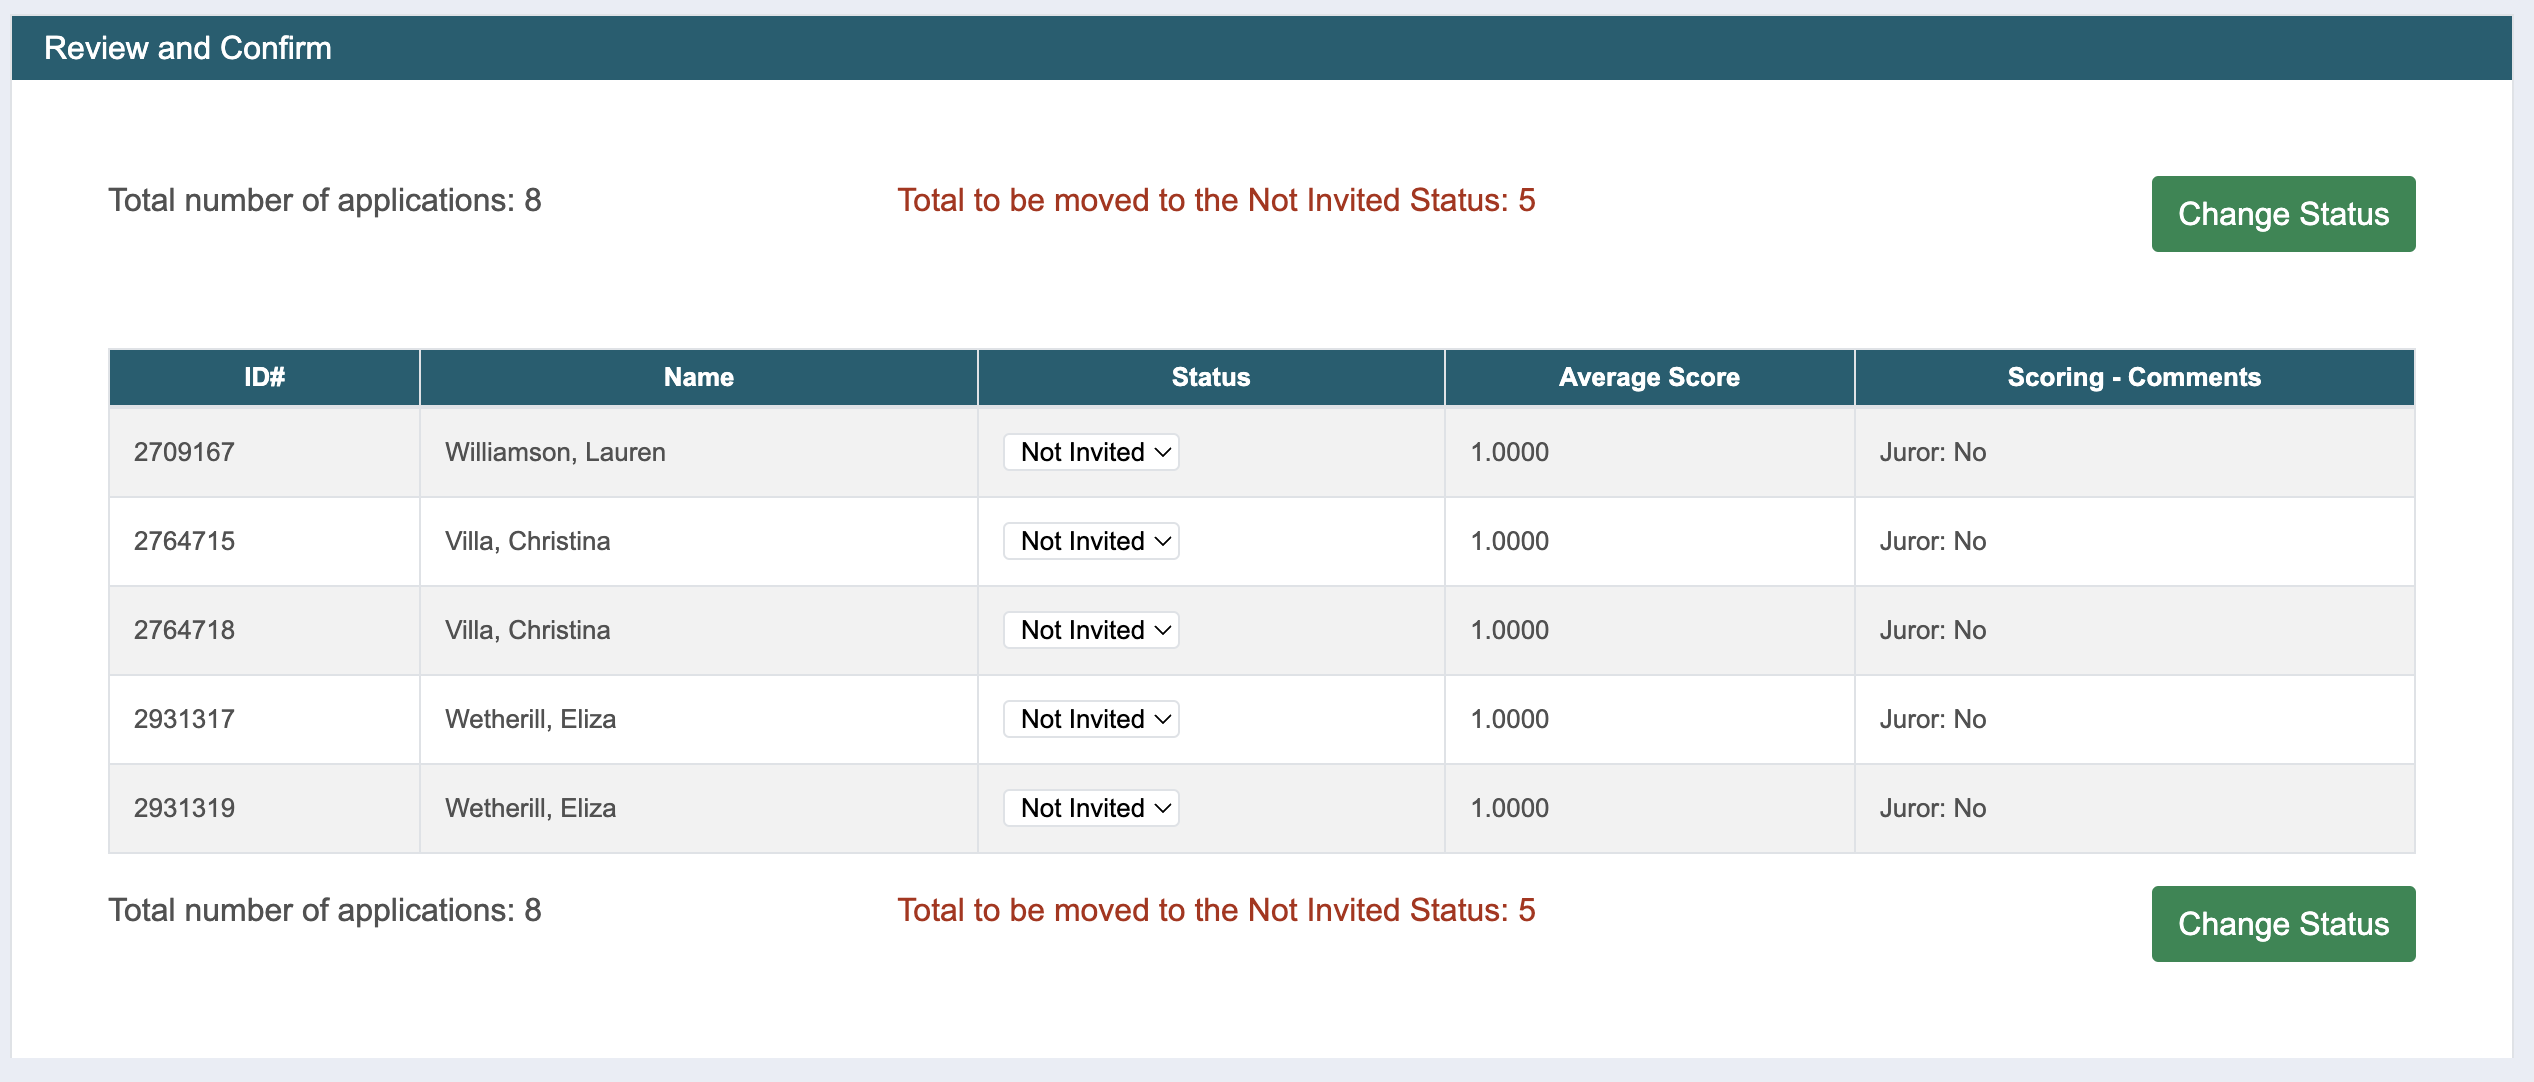
7. Review the list to confirm the entries with the lowest scores will be moved to the Not Invited status. You can change the status of an application(s) at this stage to Waitlist, Invited, or Received by changing the Status drop-down menu.
8. Click Change Status and the entries will move to the Not Invited status.
9. If you are conducting multiple rounds of jurying, return to Setup and update the Jury Round. Repeat these steps after jurors have scored the next round.
10. If you are ready to move the remaining entries to the Invited status, proceed to moving the highest scored applications to the Invited status.
How to Move Applications to the Invited Status
1. Go to Jury > Administration > Choose Event.
2. Click Manage, then click Change Status to Invited.
3. If applicable, select each Category from which you want to change the application statuses.
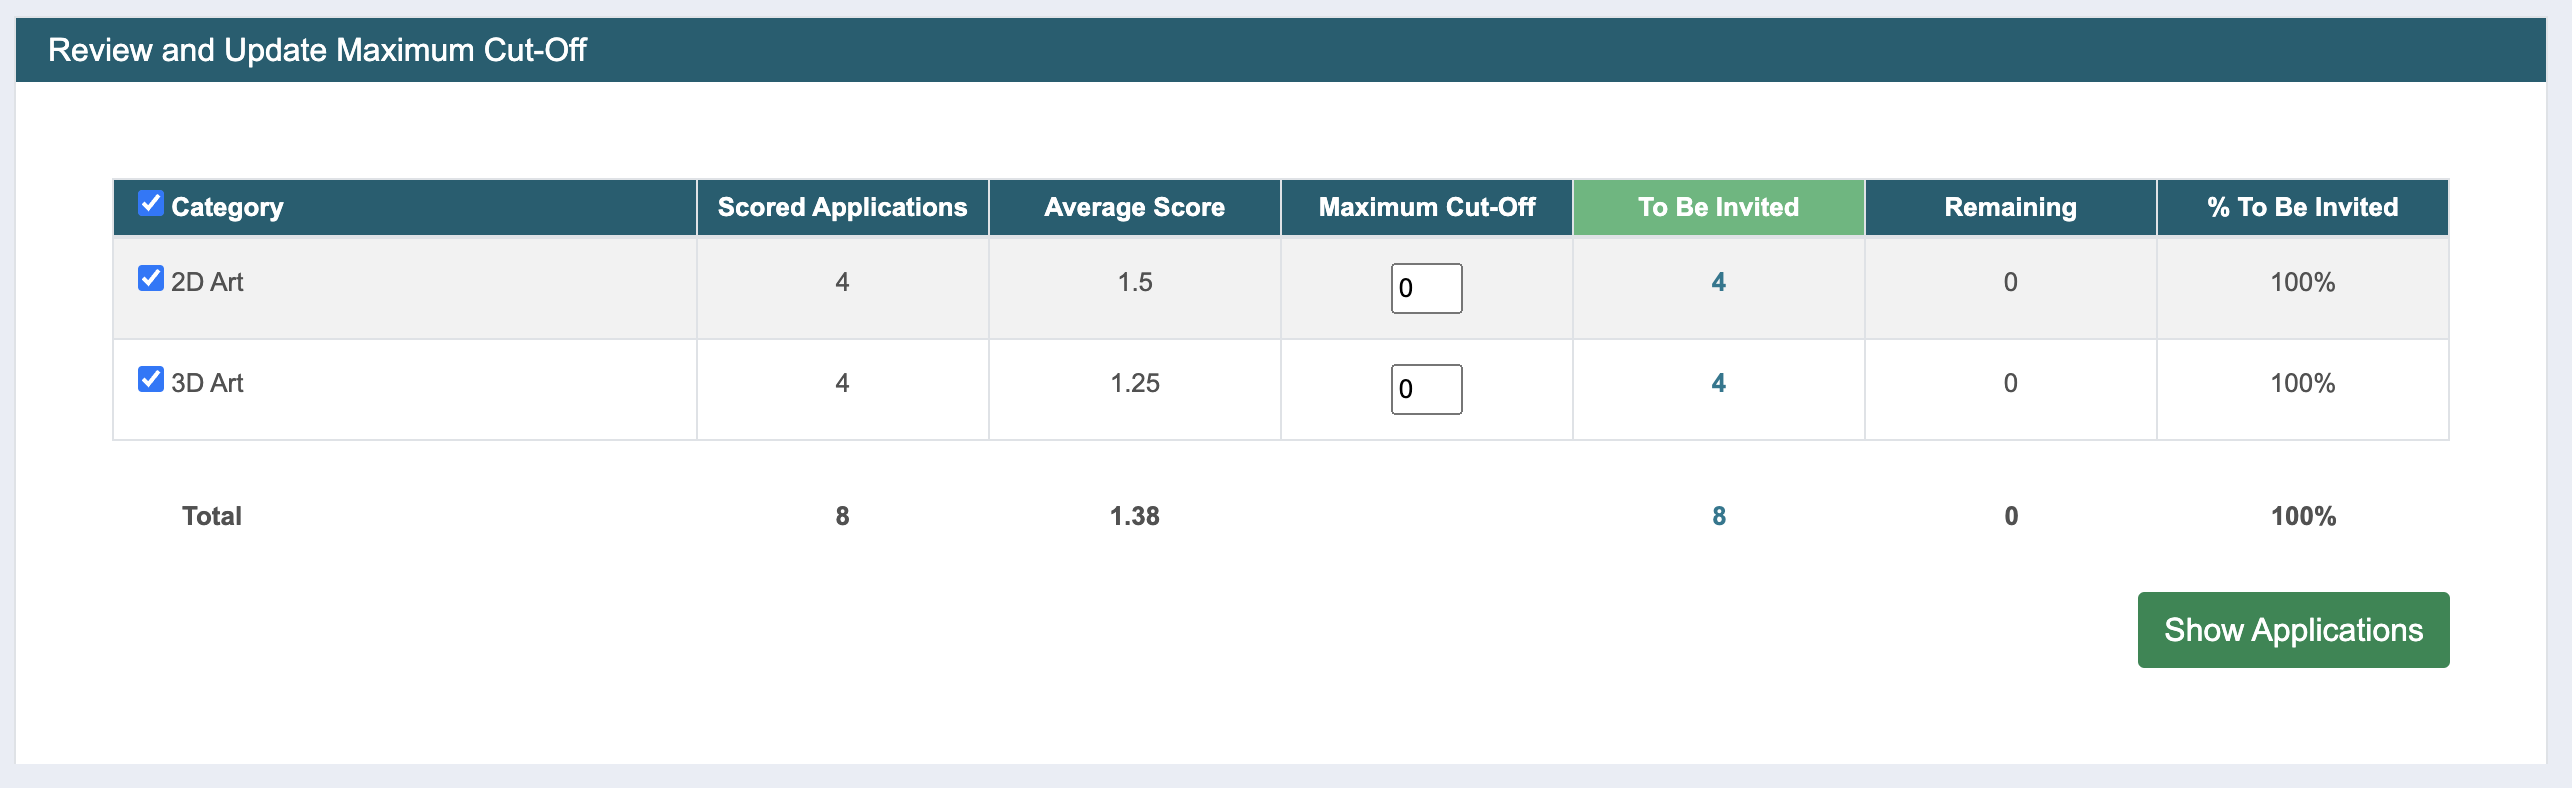
4. Enter the Maximum Cut-Off. Any entries with a score above this cut-off will be moved to the Invited status. The default maximum cut-off is 0.
- For example, if you want to invite the entries that scored higher than 5, enter 5 as your maximum cut-off.
- If you want to move all remaining entries to the Invited status, leave the maximum cut-off at 0.
5. The number of entries in the To Be Invited, Remaining, and % To be Invited columns will update automatically when you change the maximum cut-off score.
6. Click Show Applications.
Hover over the blue icons to view the definitions of each field.
1
Select the Categories from which you want to change the application statuses.
2
Leave the maximum cut-off as 0 to move all entries to Invited, or enter the desired cut-off score.
3
Click Show Applications to see the list of entries to be moved to the Invited status.
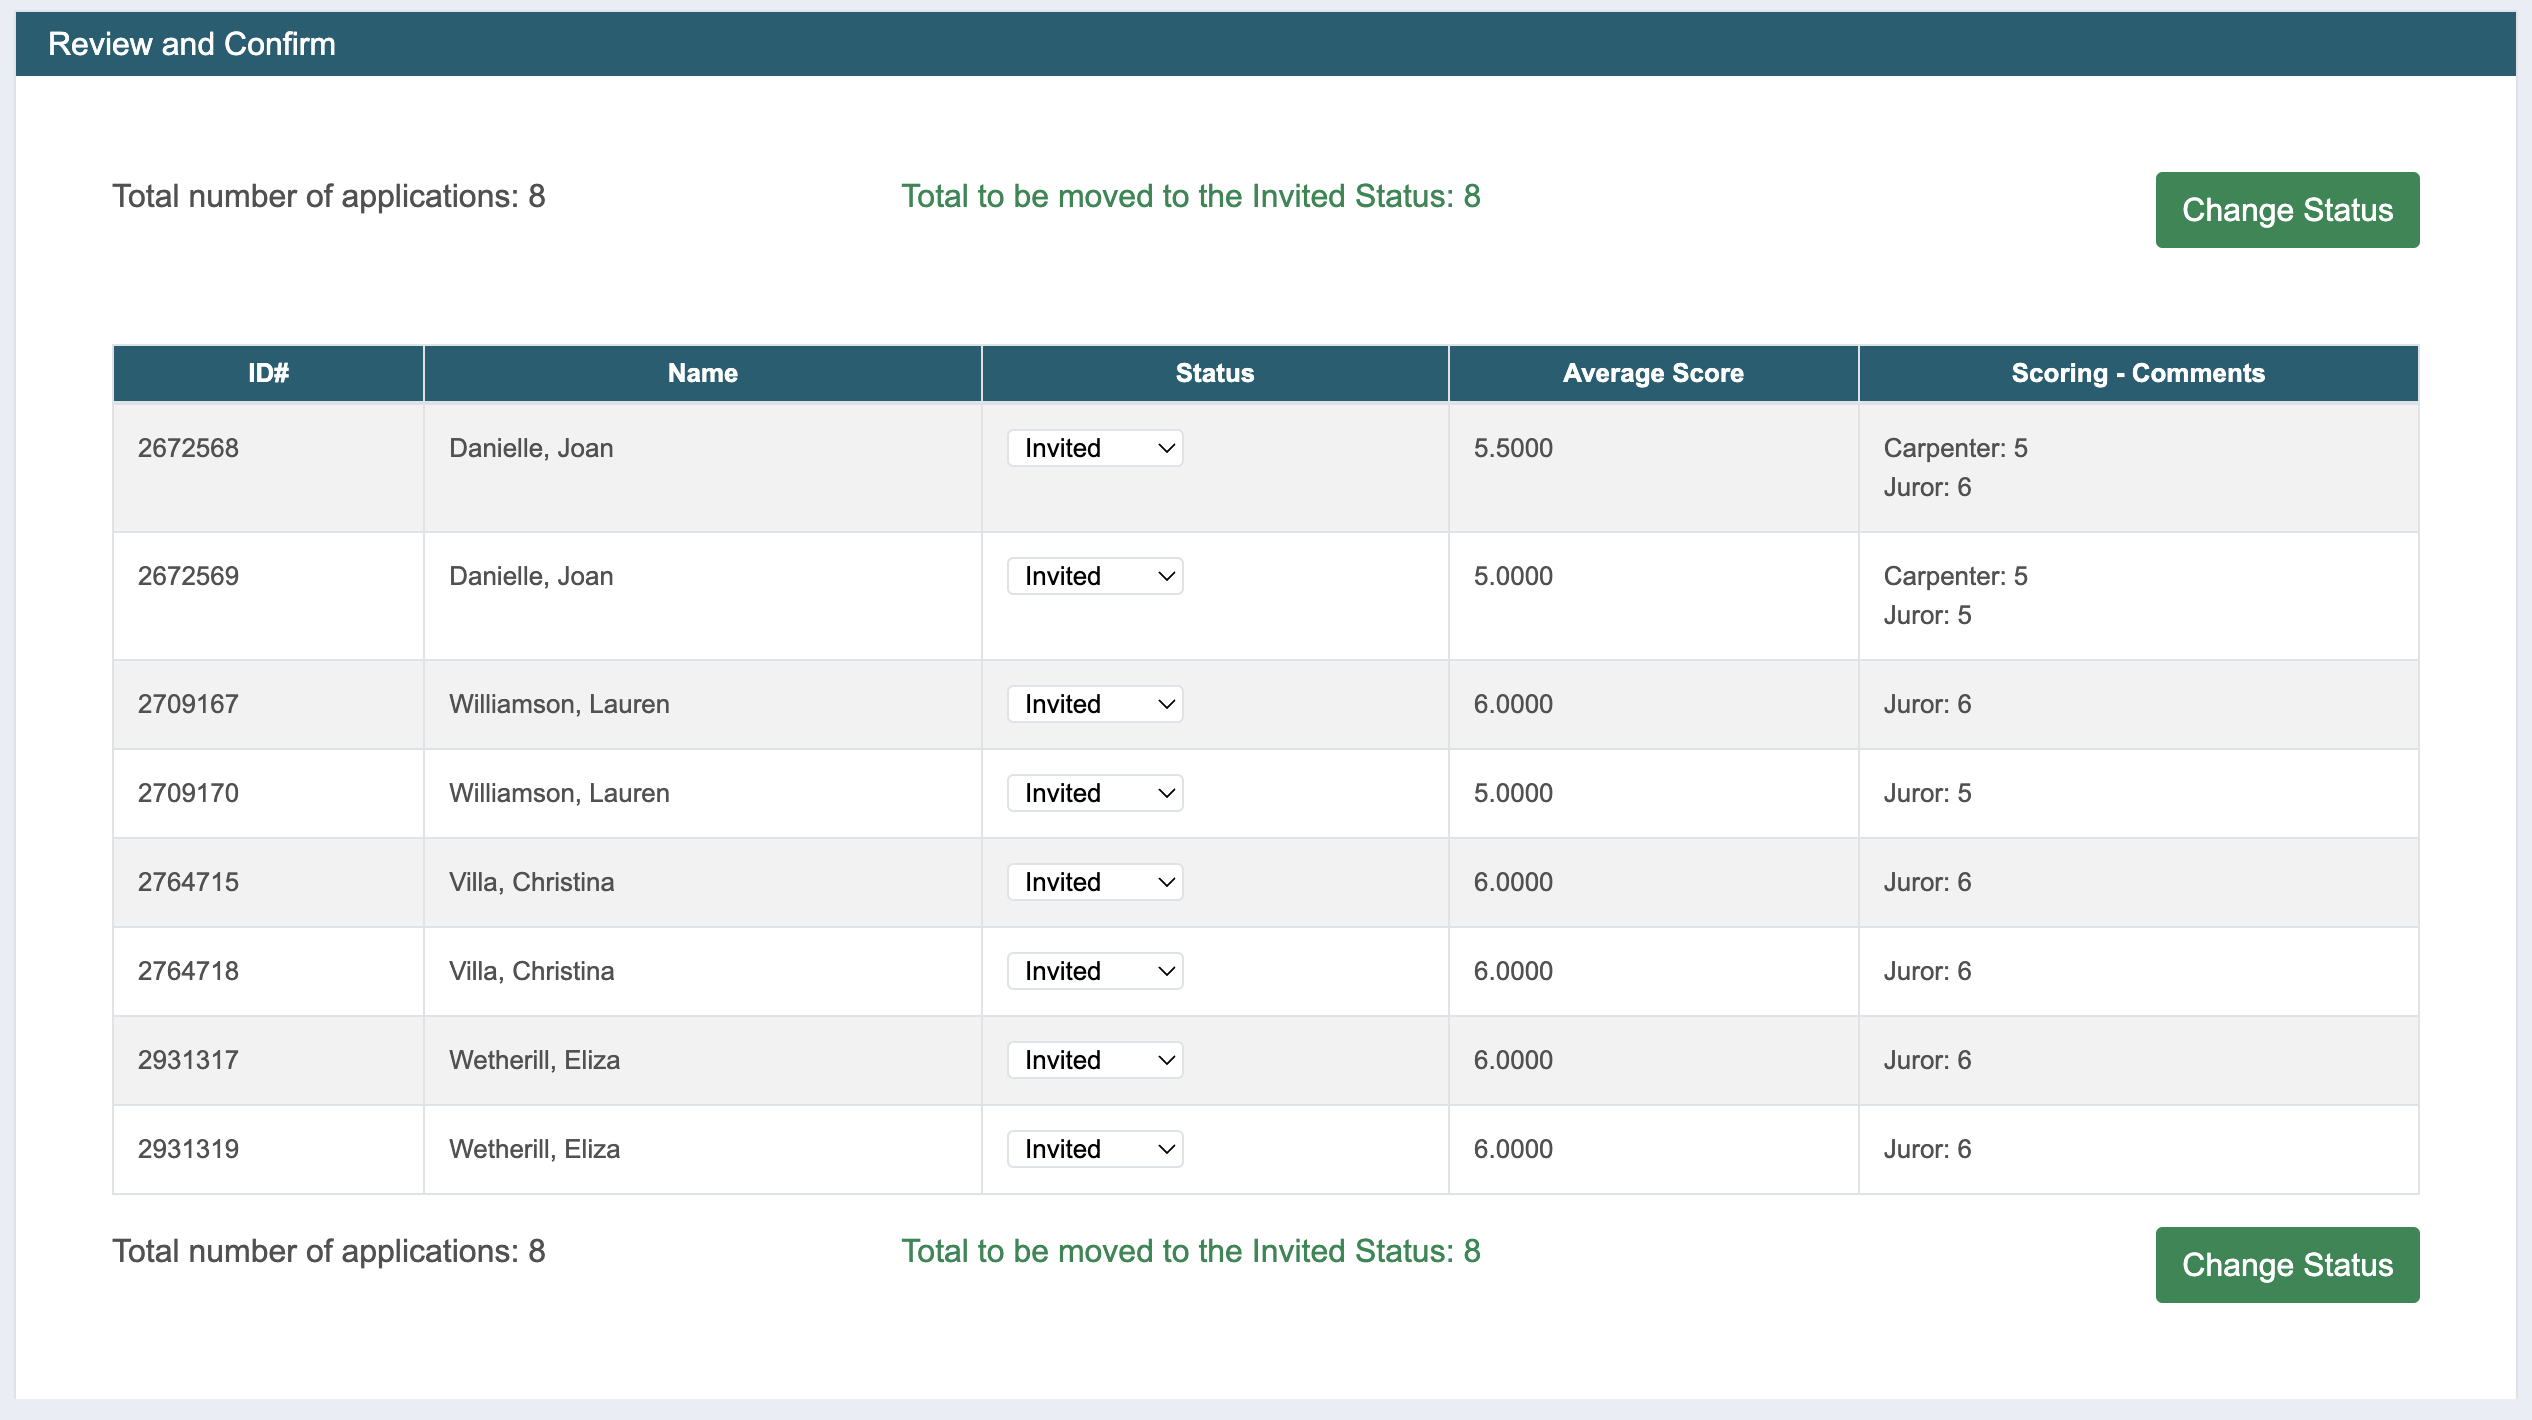
7. Review the list to confirm the entries with the lowest scores will be moved to the Invited status. You can change the status of an application(s) at this stage to Waitlist, Invited, or Received by changing the Status drop-down menu.
8. Click Change Status and the entries will move to the Invited status.
9. Go to the Events > Management page to view the entries in the Invited and Not Invited statuses.
How to Download the Scores from the Current Round
- Go to Jury > Administration > Choose Event.
- Click Manage, then click Download Juror Scores.
- The spreadsheet of scores from the current jury round will be downloaded.
Finalize
Once you have completed the scoring process and have sorted your entries between the Invited and Not Invited statuses, you are ready to finalize the jury.
How to Complete the Jury
- Go to Events > Communication to notify the artists of the jury results.
- Go to Jury > Administration, change the Jury Status to Complete, and click Save.
- Changing the Jury Status to Complete will reveal the applicants’ statuses. This will also allow applicants to archive their submissions and remove the work samples from their portfolios.
How to Download Each Jury Round’s Scoring History
- Go to Jury > Administration > Select Event.
- Click Finalize and select the Round you want to download the scores from.
- Click Download Scores to download a spreadsheet of scores from your selected round.
- To see the scoring history per round without downloading, click View Scoring History and select the round of scores you wish to view.
